


What you'll need: This will make 4-5 bibs
A yard of oil cloth (you can use a plain fabric but this will make it waterproof)
A yard of flannel, cotton or terry for the back (optional). I used some left over receiving blankets for this.
Double fold bias tape. I used 1/4 inch width.
Snap, button or velcro for closure
Newspaper to make the pattern
I didn't like the patterns I found online so I took one of the bibs we already had and measured it out on some newspaper. If you don't have newspaper, just grab some of the circulars you get in the mail. I made another piece for the pocket I wanted to add. A pocket is optional but we found pocket bibs on our toddler help keep the mess off the floor.

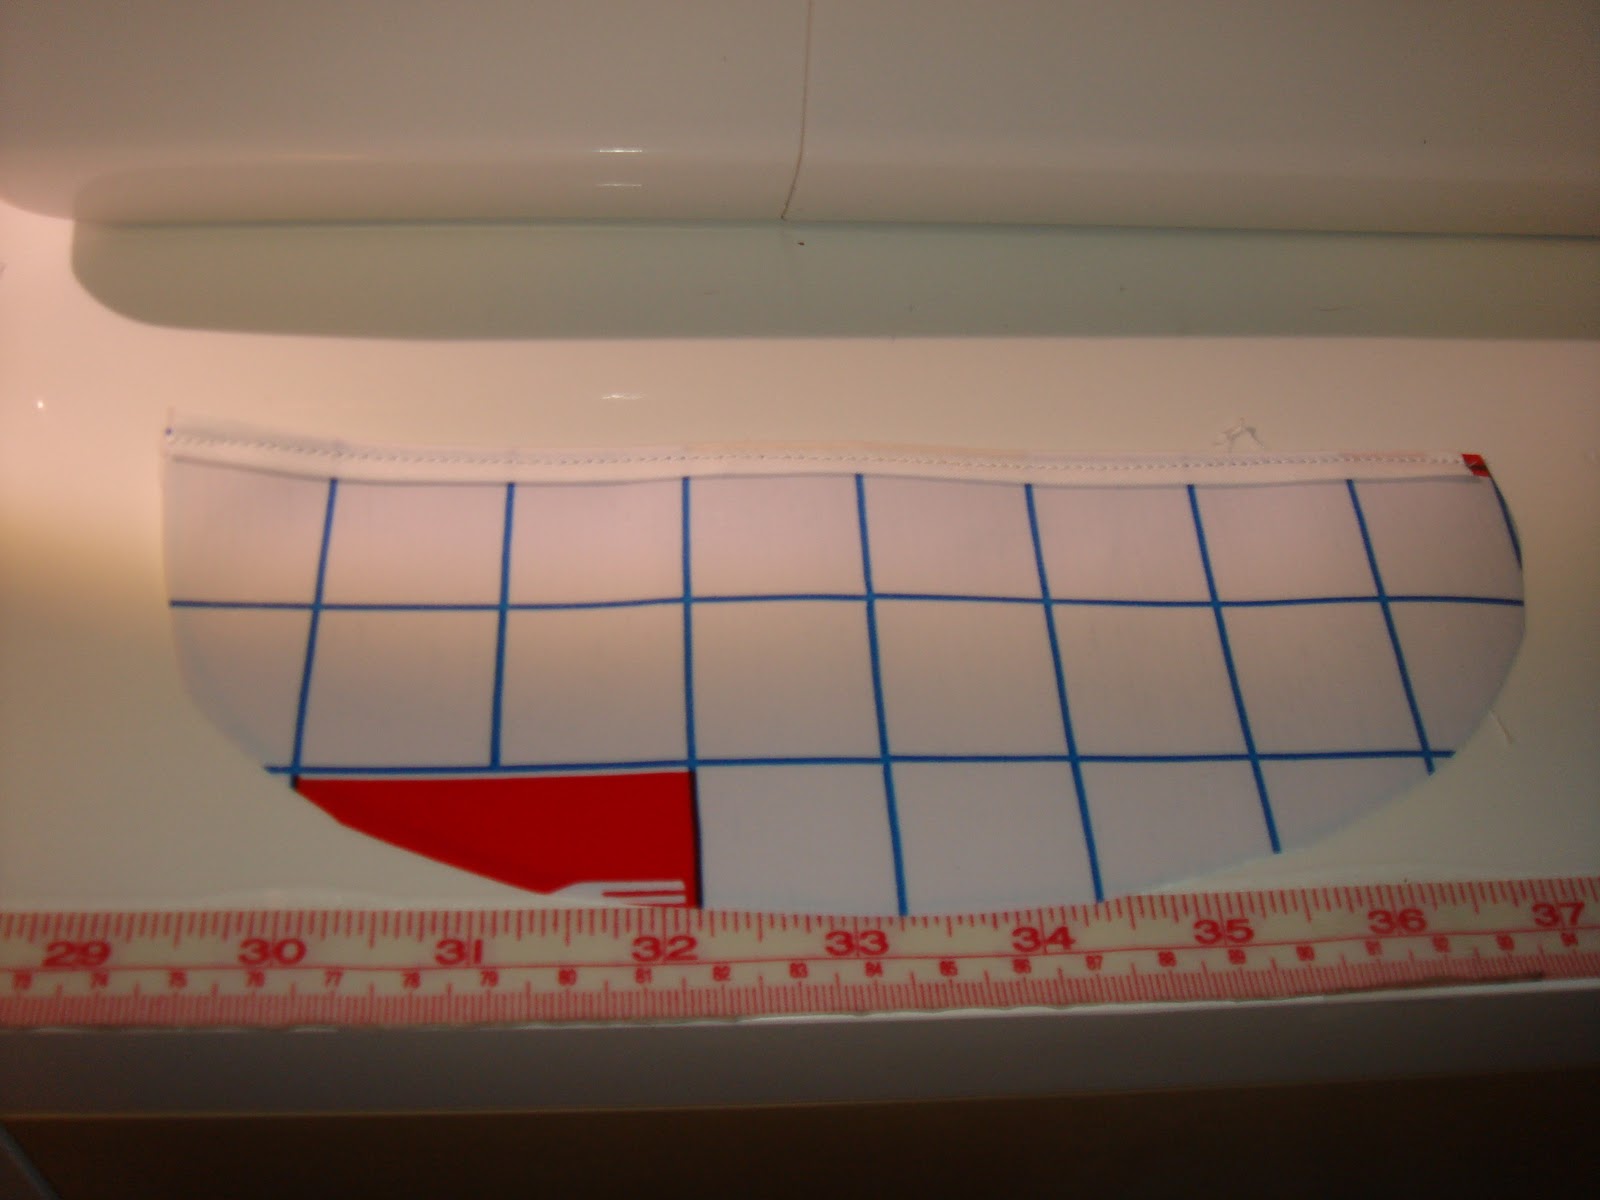
Using the bib pattern cut one main piece in oil cloth and one in flannel. Cut the pocket in your oil cloth fabric. (you could even use a piece of complementary fabric on the pocket)

Take your bias tape and sew it to the flat edge of the pocket.
Take the pocket piece and sew it to the back of your bib. Sew with the RIGHT side of the pocket facing the WRONG side of the bib. Sew with very small seam allowances so any mistakes you can cover up with the bias tape. I like to make the pocket a little bigger then the bib so when you use the bib it doesn't lay flat and helps catch more mess.

Place the 2 main bib pieces together wrong sides facing and sew them together. Make sure that when you pin your fabric you pin it close to the edge so any holes will be covered up by your bias tape. Sew close to the edge and trim the flannel fabric. The raw edges will get covered up later when we add the bias tape.

Sew the bias tape around the entire bib.


The last step is to add the closure of your choice to the bib.

Now you have an adorable bib for your little one. They make great gifts and with a more absorbant fabric on the back they can be used either way.


4 comments:
Ohhhh I have some also so this would be a great thing to make for my friends.....One thing though...after you sew the pocket to the back side I am assuming you turn it before you add the flannel piece right? I don't see that step in your tutorial...
you're right. Let me go and add that.
Feel free to share this (just give me credit)
you're right. Let me go and add that.
Feel free to share this (just give me credit)
Ohhhh I have some also so this would be a great thing to make for my friends.....One thing though...after you sew the pocket to the back side I am assuming you turn it before you add the flannel piece right? I don't see that step in your tutorial...
Post a Comment